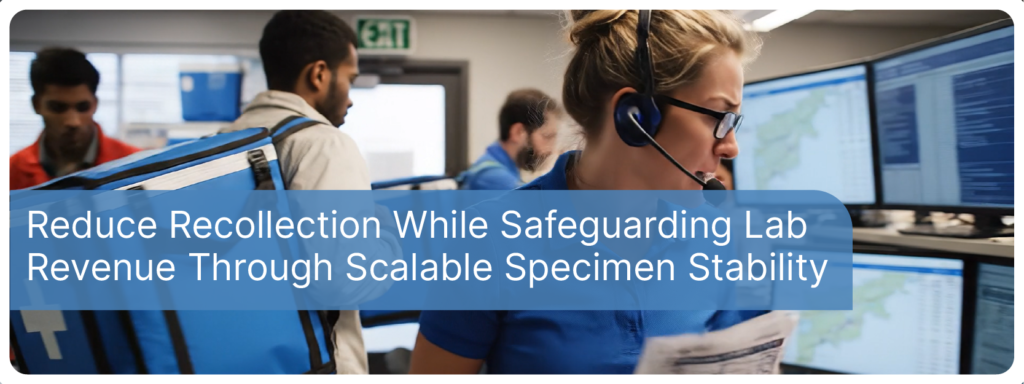
Reduce Recollection While Safeguarding Lab Revenue Through Scalable Specimen Stability
Most lab networks don’t lose money because they “don’t know” stability windows.
They lose money because those specimen stability windows aren’t enforced consistently across sites, handoffs, and routes.
That’s when result quality degrades, redraws creep up, turnaround times wobble, delay in patient care occurs and customer confidence starts to erode—one “out-of-spec” shipment at a time.
The business problem isn’t a lack of policy. It’s a lack of guardrails:
- Guardrails that prevent samples from drifting out of window during staging
- Guardrails that catch risk before receipt
- Guardrails that make exceptions visible without slowing routes
This blog shows how to build “stability guardrails” that scale across a network—and how sensor data and SOP gates can prevent out-of-spec samples from entering workflow.
What “stability windows” really mean in operations
A stability window is not just a spec in a manual. It’s a business constraint:
- Time window: how long the specimen remains acceptable from collection/pickup to processing/receipt
- Temperature window: what thermal range is required (room temp vs refrigerated vs frozen) and what excursions are unacceptable
When those two windows aren’t enforced, you don’t just risk quality. You create operational losses:
- Recollect/rework (cost and patient/provider friction)
- Turnaround Time (TAT) instability (harder staffing, more escalations)
- Investigation labor (manual reconstruction of what happened)
- Contract risk (customers want proof, not assurances)
Start with the ranges your network already uses
Even before you get analyte-specific, most networks operate within a small set of thermal categories:
- Controlled Room Temperature / Ambient (commonly defined as 15–25°C)
CDC shipping guidance explicitly calls out packing room-temperature specimens and ensuring they are 15–25°C prior to shipment. - Refrigerated (2–8°C)
- Frozen (varies by policy and test requirements)
Operator takeaway: Your first win is not perfecting every analyte. It’s enforcing the correct category consistently at each handoff.
Why enforcement breaks down (the “normal” mistakes)
Across multi-site networks, stability failures often come from repeatable patterns:
- Staging drift: specimens often sit in uncontrolled areas (near doors, on counters, in warm rooms)
- Handoff ambiguity: nobody “owns” the sample between site and courier pickup
- Late pickups / route dwell: windows get eaten up silently
- Receiving inconsistency: acceptance checks vary by person or shift
- No early warning: the first time anyone sees risk is after the sample is already delivered
The fix is a set of guardrails that makes those failure modes harder to repeat.
The Stability Guardrails Playbook (built for scale)
Guardrail 1: Define “stability classes” by specimen type (not by test list)
You don’t need a 200-line catalog to operationalize guardrails. Start with specimen classes that behave differently in the real world:
- Cell-based specimens (time-sensitive; degradation and morphology changes can occur quickly)
- Chemistry/serum/plasma (often more stable, but varies with analyte and processing)
- Coagulation specimens (often sensitive to time/temp and handling)
- Microbiology/infectious disease specimens (often have strict shipping categories and packing guidance)
Use your lab’s own catalog as the source of truth. Many large labs explicitly instruct submitters to follow test-specific stability requirements and shipping temperature conditions.
Example (why class matters)
Some specimen types are so time-sensitive that labs apply tight windows for analysis and reporting. For example, one lab analyte stability chart flags body fluid cell counts with the note that samples >2 hours are resulted with a disclaimer.
That’s a practical, ops-relevant signal: certain specimen categories can’t tolerate route variability without controls.
Guardrail 2: Add SOP “gates” at 5 points in the journey
To enforce stability, you don’t add steps everywhere. You add decision gates where drift actually happens.
Gate A — Labeling / collection complete
- Assign the stability class (Ambient / 2–8°C / Frozen + time sensitivity tag)
- Start the clock (collection time or readiness time)
Gate B — Site staging
- Confirm specimen is in an approved zone (e.g., 15–25°C or 2–8°C)
- Set a max dwell rule per class (your policy)
Gate C — Courier pickup
- Confirm pickup timestamp (clock continues)
- Confirm correct thermal state at pickup (ambient vs refrigerated)
- Confirm proof of chain of custody
Gate D — In-transit monitoring
- Use alerts for “approaching window” and “out-of-range temperature”
- Trigger only actionable alerts (avoid noise)
Gate E — Receipt at lab
- Verify arrival time (transport time can be calculated; many lab shipping guides emphasize capturing arrival/transport timing)
- Verify thermal condition / packaging integrity
- Decide accept / hold / reject based on written acceptance criteria
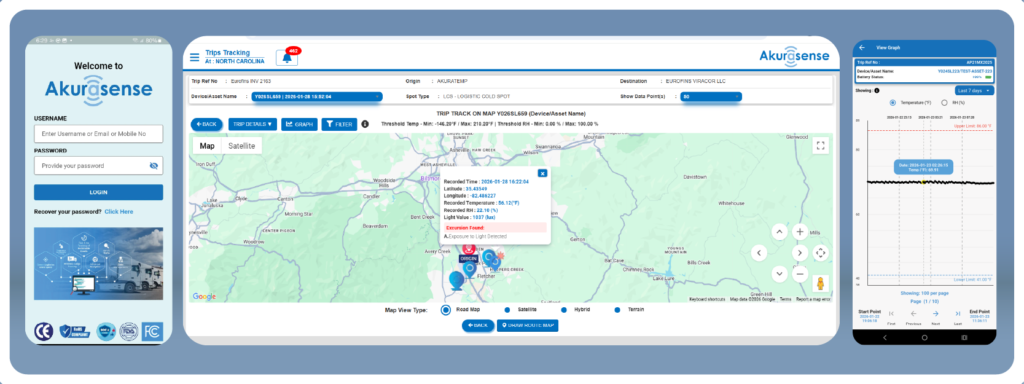
Guardrail 3: Use sensor data to enforce the gate logic (not just to create logs)
Sensor data becomes valuable when it’s tied to operational decisions:
- Approaching time window: reroute, expedite, or prioritize receiving
- Thermal drift during staging: fix the staging zone/SOP (not the route)
- Repeated excursions on same lane: route-risk change (pickup schedule, packaging profile, training)
CDC guidance on packaging emphasizes ensuring specimens are already at desired temperature and maintaining appropriate conditions during shipment.
The operational leap is: don’t just “maintain”—verify and act before a sample crosses a line.
Guardrail 4: Standardize “acceptance and exception” decisions
If you want stability enforcement at scale, your receiving team needs consistency:
- What is acceptable vs unacceptable for each stability class?
- What requires a disclaimer vs rejection?
- Who approves exceptions?
- What evidence gets attached automatically?
This eliminates the worst outcome: a compromised sample that enters workflow because the receiving check was inconsistent.
Practical examples (how guardrails prevent out-of-spec)
Example 1: Time-sensitive cell-based specimens
If a specimen class has tight time tolerance (like certain cell count workflows), you can set a “time-left” alert and prioritize delivery/receipt workflows—so you don’t find out after the fact. (The “>2 hours disclaimer” example shows how some labs treat late samples differently.)
Example 2: Ambient shipments that accidentally get refrigerated (or vice versa)
CDC guidance defines room temperature packing as 15–25°C and stresses ensuring specimens are at that range prior to shipment.
A simple guardrail is a staging gate with sensor confirmation so “ambient” doesn’t quietly become “whatever the room was.”
Stability guardrails with automated proof
Akuratemp’s role is to help you run stability as an operational system:
Akurasense®: sensor data that drives action
- Capture time, temperature and location context
- Trigger alerts aligned to your SOP gates (approaching window, out-of-range temp)
- Create defensible evidence automatically—without manual reconstruction
Akuratemp® SMART Shippers / Totes: predictable thermal profiles
Validated packaging reduces variability, so your guardrails don’t rely on perfect conditions at every stop.
Result: fewer out-of-spec samples, fewer recollects, more stable TAT—while compliance becomes the value-added byproduct because proof is captured by design.
Request a Stability Guardrails Audit
If you’re seeing redraws, recurring “late” specimens, or debates at receiving,request a Stability Guardrails Audit. We’ll map your specimen journey gates (from label to handoff to staging to pickup and receipt), identify where stability breaks down, and provide a practical set of SOP guardrails and sensor-driven triggers that prevent out-of-spec samples—without slowing routes.